 Bahasa

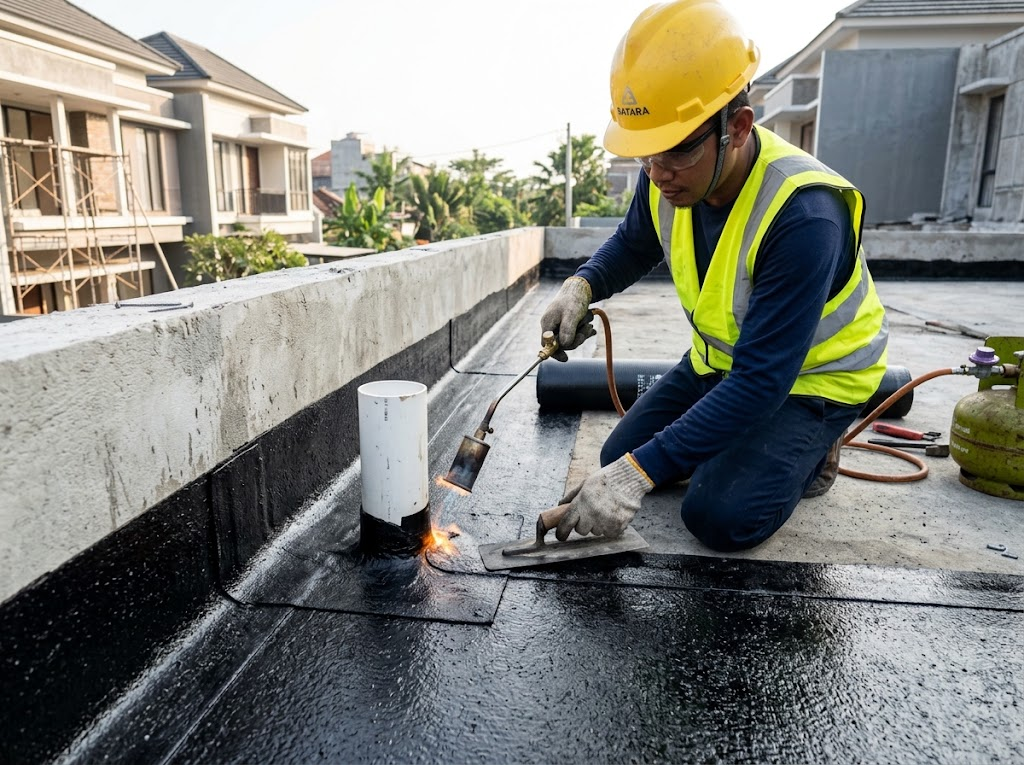
Waterproofing Membrane: How to Prevent Leaks Around Corners and Pipes
Even concrete roof slabs protected with waterproofing materials can still develop leaks if joints, transitions, and other critical details are not properly treated.
Many building owners and contractors become frustrated when water stains appear on their ceilings, often blaming the overall quality of the waterproofing material.
However, wall corners, pipe penetrations, and drainage outlets require special attention during waterproofing membrane installation because they can become potential entry points for water if not properly sealed.
In this article, we explain the technical considerations for treating waterproofing membrane joints to help create a reliable, watertight roofing system.
Why Are Waterproofing Joints More Vulnerable to Leaks?
In waterproofing systems, floor-to-wall junctions, pipe penetrations, and drainage outlets require specialized installation techniques. Changes in surface geometry and transitions between different materials mean that membrane installation must be adapted to the construction details and application methods used.
Proper detailing at these critical points helps minimize the risk of water infiltration and supports the long-term performance of the waterproofing system.
Critical Areas in Torch-Applied Membrane Installation
For flat roofing and basement waterproofing projects, several vulnerable areas require extra attention and precise membrane cutting techniques.
- Floor-to-Wall Junctions (Parapets): These 90-degree corners may be vulnerable to structural movement and stress concentration.
- Pipe Penetrations: Plumbing pipes and electrical conduits that pass through the waterproofing layer can create potential pathways for water infiltration.
- Floor Drains: These low points collect water before it flows into the drainage system and require careful waterproofing details.
If these areas are not treated correctly, water may penetrate beneath the membrane through gaps or poorly bonded sections, potentially compromising the waterproofing system.
Installation Standards for Corners and Pipe Penetrations
To help achieve long-lasting waterproofing performance, follow the appropriate installation procedures and the membrane manufacturer's technical recommendations.
1. Prepare the Corners by Creating a Cant Strip
Avoid forcing the waterproofing membrane to bend sharply around a 90-degree corner between the floor and wall.
Instead, create a sloped or rounded cement mortar fillet, commonly known as a cant strip or chamfer, along the junction, as appropriate for the waterproofing system.
This transition helps reduce stress on the torch-applied membrane and minimizes the risk of cracking, splitting, or tearing when the substrate experiences temperature-related movement.
2. Maintain the Correct Overlap and Wall Upstand Height
When joining two membrane sheets, ensure that the overlap meets the manufacturer's requirements. A minimum overlap of approximately 10 cm is commonly specified for certain torch-applied bituminous membranes, but the exact width must be confirmed against the product's technical documentation.
The membrane should also extend vertically up the parapet wall rather than ending flush with the floor.
A wall upstand height of approximately 20–30 cm is often used as a general reference, subject to the project design and applicable specifications. The upper edge should be properly terminated and sealed using a compatible sealant, termination bar, or metal flashing detail.
These measures help reduce the risk of water entering through membrane joints and wall transitions.
3. Provide Additional Reinforcement Around Floor Drains
Before installing the main membrane layer, apply an additional reinforcement patch around the floor drain or pipe opening, following the manufacturer's recommended detailing method.
For torch-applied membranes, the reinforcement patch must be heated and bonded carefully to the prepared substrate and integrated with the drain assembly to create a continuous waterproofing layer.
The membrane should be detailed around the drain throat and flange to minimize gaps that could allow water to seep beneath the concrete surface.
For a more comprehensive overview of the installation process, read our guide to Torch-Applied Waterproofing Membranes for Flat Roofs.
If you are considering liquid-applied waterproofing instead, explore our comparison of Waterproofing Membranes vs. Waterproofing Coatings.
Inspection Checklist Before the Finishing Stage
Once all corners, joints, and pipe penetrations have been properly sealed, the next essential step is to inspect the waterproofing installation and conduct a flood test where appropriate.
As a general reference, a concrete roof slab may be subjected to a controlled water ponding test for 24 hours, or for the duration specified in the product's Technical Data Sheet (TDS) and project requirements, before the waterproofing layer is covered with a cement screed.
Before testing, ensure that the structure can safely support the additional water load and that the test area can contain the water without damaging adjacent spaces.
If the inspection reveals signs of leakage, repair the affected areas and repeat the test as necessary before proceeding with the finishing work.
Choose Quality Waterproofing Materials from Batara Group
Installing waterproofing membranes around corners and pipe penetrations requires careful attention to application details and the selection of materials suited to the project's conditions.
Batara Group offers a selection of waterproofing products from various brands, including Casali and Wisproof, to support the waterproofing requirements of residential, commercial, and other building projects.
Contact the Batara Group team to explore suitable waterproofing products and obtain information about their specifications, applications, and recommended installation methods.