 Bahasa

Sealant Adhesive: Step-by-Step Application for a Neat and Long-Lasting Finish
Have you ever noticed silicone sealant around a sink or window that looks messy, uneven, and starts developing mold within just a few weeks?
Many people assume that sealing gaps is a simple task that only requires squeezing a sealant tube directly onto the surface.
However, improper surface preparation and application techniques can reduce sealant adhesion and increase the risk of leaks at joints.
This article will guide you through the professional and standardized sealant application process.
By mastering the proper sealant adhesive application techniques, you can achieve a neat, watertight, and long-lasting finish comparable to the work of an experienced professional.
Factors That Affect Sealant Application Results
Sealant performance depends on several factors, including surface conditions, product selection, gap dimensions, and application techniques. Clean surfaces that meet the product requirements help ensure proper adhesion, while consistent application techniques help create a smooth and uniform finish.
Preparing Tools and Cleaning the Surface
Proper preparation is essential for achieving strong sealant adhesion. If the surface is still dusty or oily, the sealant may not bond properly to the substrate.
Follow these essential steps before using a caulking gun.
- Prepare the Necessary Tools: Gather a caulking gun, a sharp utility knife, masking tape, and a smoothing tool.
- Clean the Surface Thoroughly: Ensure the gap to be sealed is completely clean and dry. Use an appropriate cleaner to remove oil, dust, and other contaminants. If using alcohol or a specialized cleaning solution, make sure it is compatible with the substrate and allow the surface to dry before application.
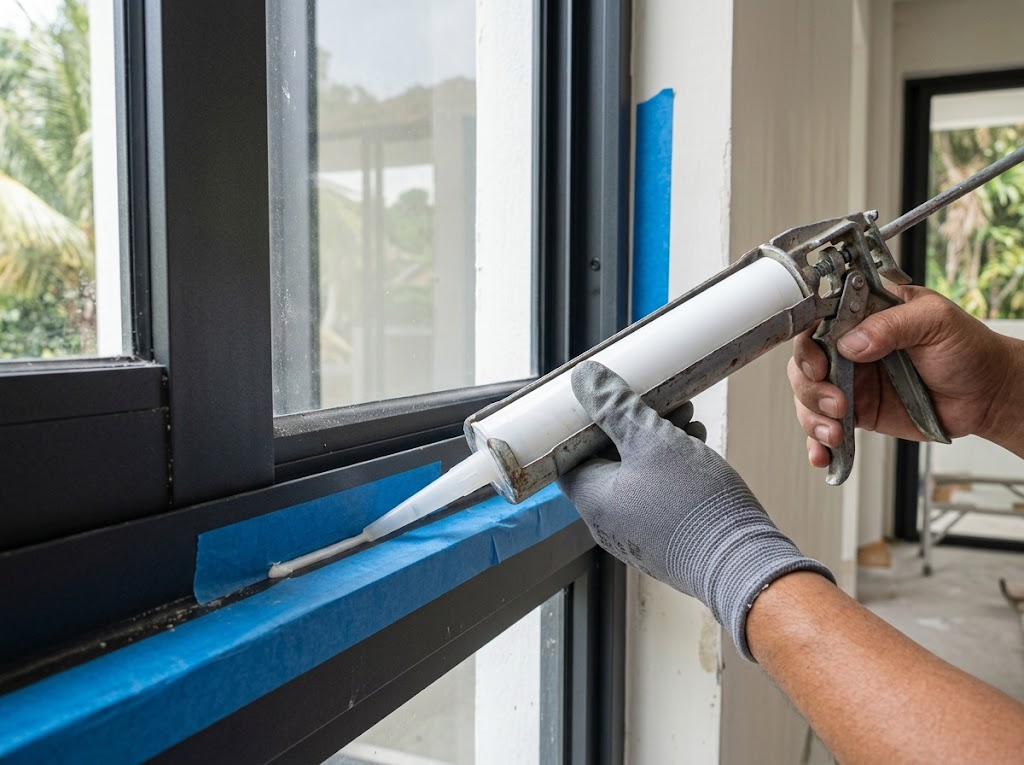
- Apply Masking Tape: Place masking tape along both sides of the gap to create straight, clean edges and prevent excess sealant from spreading onto adjacent surfaces.
Cutting the Nozzle and Applying the Sealant Bead
One of the most common mistakes beginners make is cutting the nozzle straight across.
The recommended approach is to cut the nozzle at approximately a 45-degree angle. Adjust the opening size according to the width of the gap you need to seal.
When applying the sealant, maintain a steady hand and move the caulking gun continuously along the joint.
Avoid moving too slowly or dispensing excessive sealant, as this can result in overfilling and make the smoothing process more difficult.
Smoothing the Sealant and Curing Process
After applying the sealant along the gap, smooth the surface immediately using a suitable tooling tool or another method recommended by the manufacturer.
Smoothing should be completed before the sealant begins to form a surface skin, which can occur within the first 5–10 minutes, depending on the product and environmental conditions.
Carefully remove the masking tape by pulling it outward at approximately a 45-degree angle before the sealant dries. This helps maintain clean edges without disturbing the applied bead.
Finally, allow the sealant to dry and cure according to the manufacturer's instructions. For Viscous products, the tack-free or touch-dry time is approximately 5–10 minutes for certain products, while full curing takes longer and depends on the product formulation, application conditions, and sealant thickness.
Common Sealant Application Mistakes to Avoid
Many projects experience recurring leaks because the wrong sealant formulation is used for the application. Before purchasing a product, read our guide on How to Choose the Right Sealant for Different Materials and Applications.
Additionally, avoid applying sealant to damp outdoor surfaces or when rain is imminent, unless the product is specifically designed for those conditions.
Do not apply an excessively thin bead, either. An insufficient amount of sealant may tear or fail when building materials expand and contract due to temperature changes.
Applying Sealant to Aluminum Window Joints
Aluminum window frame joints must be sealed correctly to help prevent rainwater from entering through gaps.
Dusty or contaminated surfaces can reduce adhesion and increase the risk of sealant detachment. Therefore, clean the surface thoroughly before application and use masking tape to achieve a neat, professional finish.
Choose a sealant that is compatible with the substrate and suitable for the expected weather exposure. Viscous offers silicone sealant options for various joint-sealing applications.
Proper surface preparation, appropriate product selection, and correct application techniques help create durable, neat joints and reduce the risk of water seepage.
Choose the Right Sealant for Your Project
Selecting the right sealant requires careful consideration of the substrate material, gap dimensions, and application environment. Estimating the required material quantity is also important for efficient product use and cost control.
Read our guide on How to Calculate Sealant Requirements to estimate the amount of sealant needed for your project.
Viscous offers silicone sealant options for a variety of joint-sealing applications. Always ensure that the selected product is suitable for the material and application conditions.
For construction material requirements, Batara Group provides a range of building solutions, including Viscous sealant products. Contact Batara Group to learn more about the products best suited to your project.